Frequently Asked Questions
 How to access the IDE after I've created an account?
Codeanywhere has introduced a new and improved VS Code based editor with a completely revamped experience.
Find out here how to access it.
 Which template to select? Which programming language will I use the most?
Codeanywhere offers you a wide range of predefined templates:
- PHP – LAMP Development Stack with phpMyAdmin and Composer preinstalled
- NodeJS – NodeJS Development Stack with npm and yarn preinstalled
- Ruby – Ruby Development Stack with RVM and Ruby on Rails preinstalled
- Python – Python Development Stack with pyenv, pip and virtualenv preinstalled
- C/C++ – C/C++ Development Stack with gcc and g++ compiler and gdb preinstalled
- HTML – HTML5 Development Stack with Apache, Node.js and npm preinstalled
- Wordpress – LAMP Development Stack with Wordpress, phpMyAdmin and Composer preinstalled
- Java – Java Development Stack with OpenJDK7, OpenJDE7 and Tomcat7 preinstalled
- .NET Core – .NET Core Development Stack
- Go – Go Development Stack with Go and gvm preinstalled
- Rust – Rust Development Stack with Rust and Cargo preinstalled.
You should use a template or a programming language which best fits your programming needs. If you wish to create a custom template, you can do so by following these instructions.
 Which connections are allowed and how to connect them?
Codeanywhere offers their users the ability to create the following types of connections:
- SSH
- FTP
- FTPS
Don't know how to create a new connection? Learn here.
 How to enable team sharing?
Codeanywhere now allows you the collaborate on projects as a Team. Find out here how to activate it.
 How to enable collaborative programming?
Collaborative programming is enabled by default in Codeanywhere. All you need to do is invite a friend and start coding.
 How to edit container configuration details?
Unfortunately, it isn't possible to edit container configuration details.
 How to validate SSH / SFTP / Public / Private keys?
This section will be implemented soon. Feel free to help us by contributing to our documentation.
 How to integrate GitHub into Codeanywhere?
See our detailed explanation here.
 Can I use custom extensions in the editor?
Codeanywhere offers you the ability to use custom VSIX extensions in the IDE. Find more information here.
 How can I preview my app progress?
You can find out more information about the Preview Ports widget here.
 How can I use the new IDE with third-party-connections?
Our new IDE does not support third-party connections. You can still browse them inside the old IDE found here.
 What is a Coding Session?
Coding Sessions are collaborative programming sessions with more than one participant. They provide a way for users to collaborate on their code in real-time with collaboration terminals and a fully integrated chat.
 How many users with a basic plan can participate in a coding session?
Codeanywhere doesn't limit the number of users that can participate in a coding session.
 How many different coding sessions can be run concurrently with the basic plan?
Codeanywhere doesn't limit the number of concurrent coding sessions.
 How to invite a friend to collaborate?
Codeanywhere offers their users the ability to share their containers and projects with their friends and coworkers.
Find out here how to invite other users.
 What is a container?
Containers are like your own Virtual Private Servers (in essence they are OpenVZ OS containers) provisioned by Codeanywhere, each one with its own amount of RAM, disk space and processing power.
Containers give you the ability to provision any development environment you like. You can choose between one of the many predefined templates which Codeanywhere offers.
Learn how to create a container here.
 Which programming language can I use in the container?
Codeanywhere offers support for a wide range of programming languages in the shape of the following predefined templates:
- PHP
- NodeJS – JavaScript
- Ruby
- Python
- C/C++
- Wordpress – PHP
- Java
- .NET Core – C#
- Go
- Rust
If you wish to use a different programming language, you can do so by creating a container with a Blank template, and installing the necessary dependencies in the container terminal.
 Can I install extensions from the VS Code marketplace?
Codeanywhere users can choose from a wide variety of extensions from the OpenVSX registry.
Find out here how to install extensions from the marketplace.
 How can I connect my container to a FTP connection?
Connecting your existing FTP connection to a container is pretty straight-forward. Open the IDE for any of your created containers and navigate to the Connections widget in the sidebar.
If you have already created an FTP extension, you will now be able to interact with it in the IDE.
 How can I use my Github repository in a container?
You can work directly with your repositories in the IDE. Find more information here.
 How can I connect to my container via SSH (e.g. Putty)?
You can connect to all of your containers via SSH. You can find the host and port of your container by navigating to Help -> Getting Started.
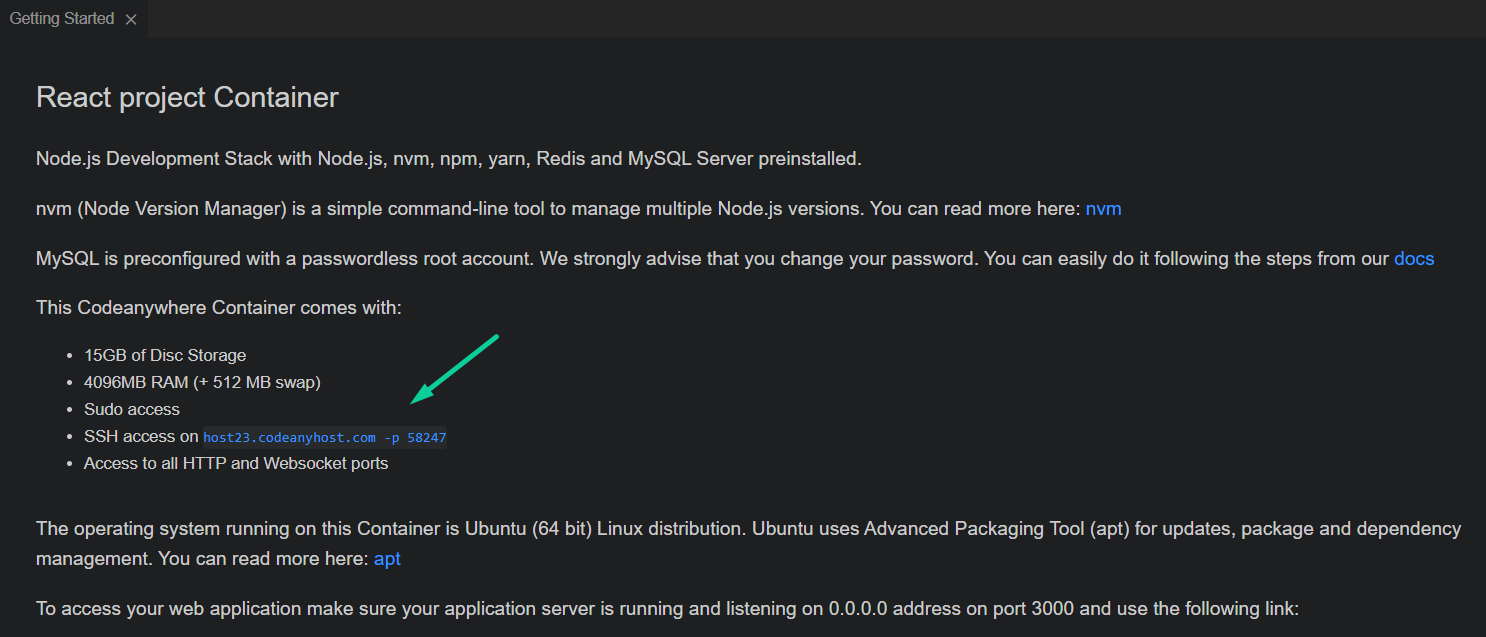
Note: The username for the SSH connection is always cabox
For the above container, you would connect via SSH by entering the following command in the terminal:
ssh cabox@host30.codeanyhost.com -p 42293
Note: You have to authorize your private key to enable the SSH connection.
 How can I authorize my computer to connect via SSH to my container?
To authorize yourself to access your container, you will have to add your public key to the
~/.ssh/authorized_keys file.
To generate a key pair enter the following command into your terminal and select the destination where you want the keys to be generated:
ssh-keygen -t rsa
Once the keys have been generated, copy the id_rsa.pub (If you chose a different name for the keys, make sure you select the one with the .pub extension).
Paste the key inside of the ~/.ssh/authorized_keys file inside your container.
vi ~/.ssh/authorized_keys
(:wq to close and save when you're done).
 How do I hit my API with Postman?
After you start your server application, click on the Open Browser button when it shows up at the bottom of your screen. If you close the widget, you can always find your public port in the Preview ports widget.
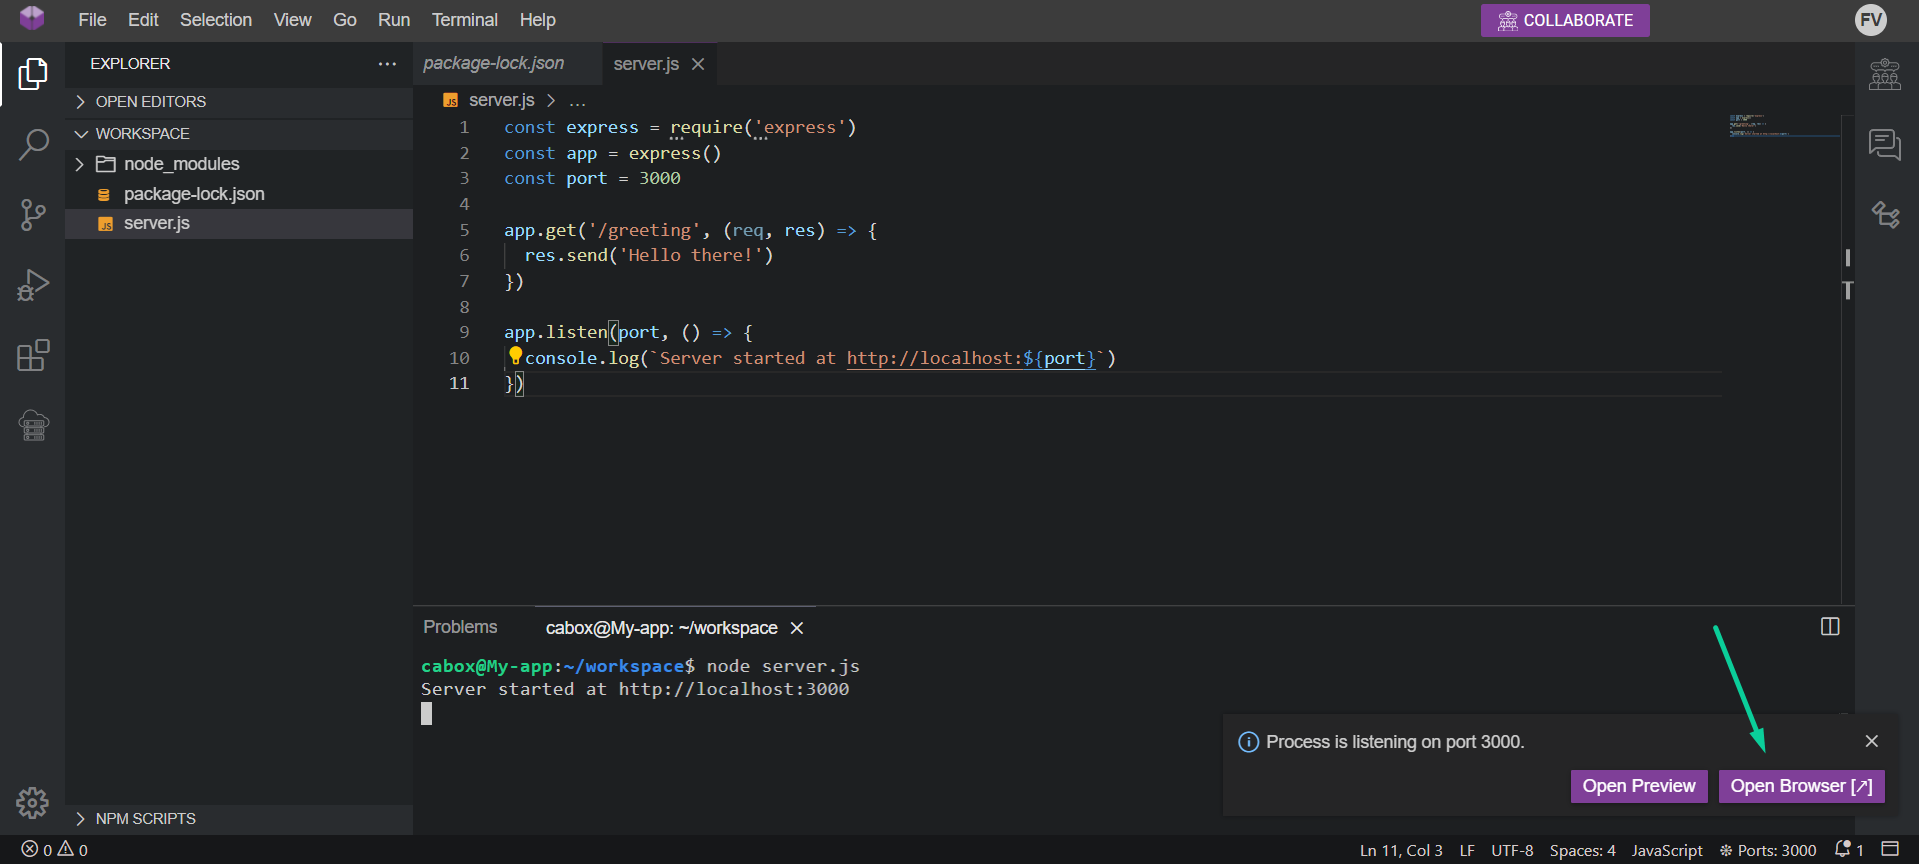
You can find the public link for your API in the new tab which will open in your browser window.
https://port-3000-my-app-fabjanv.codeanyapp.com/
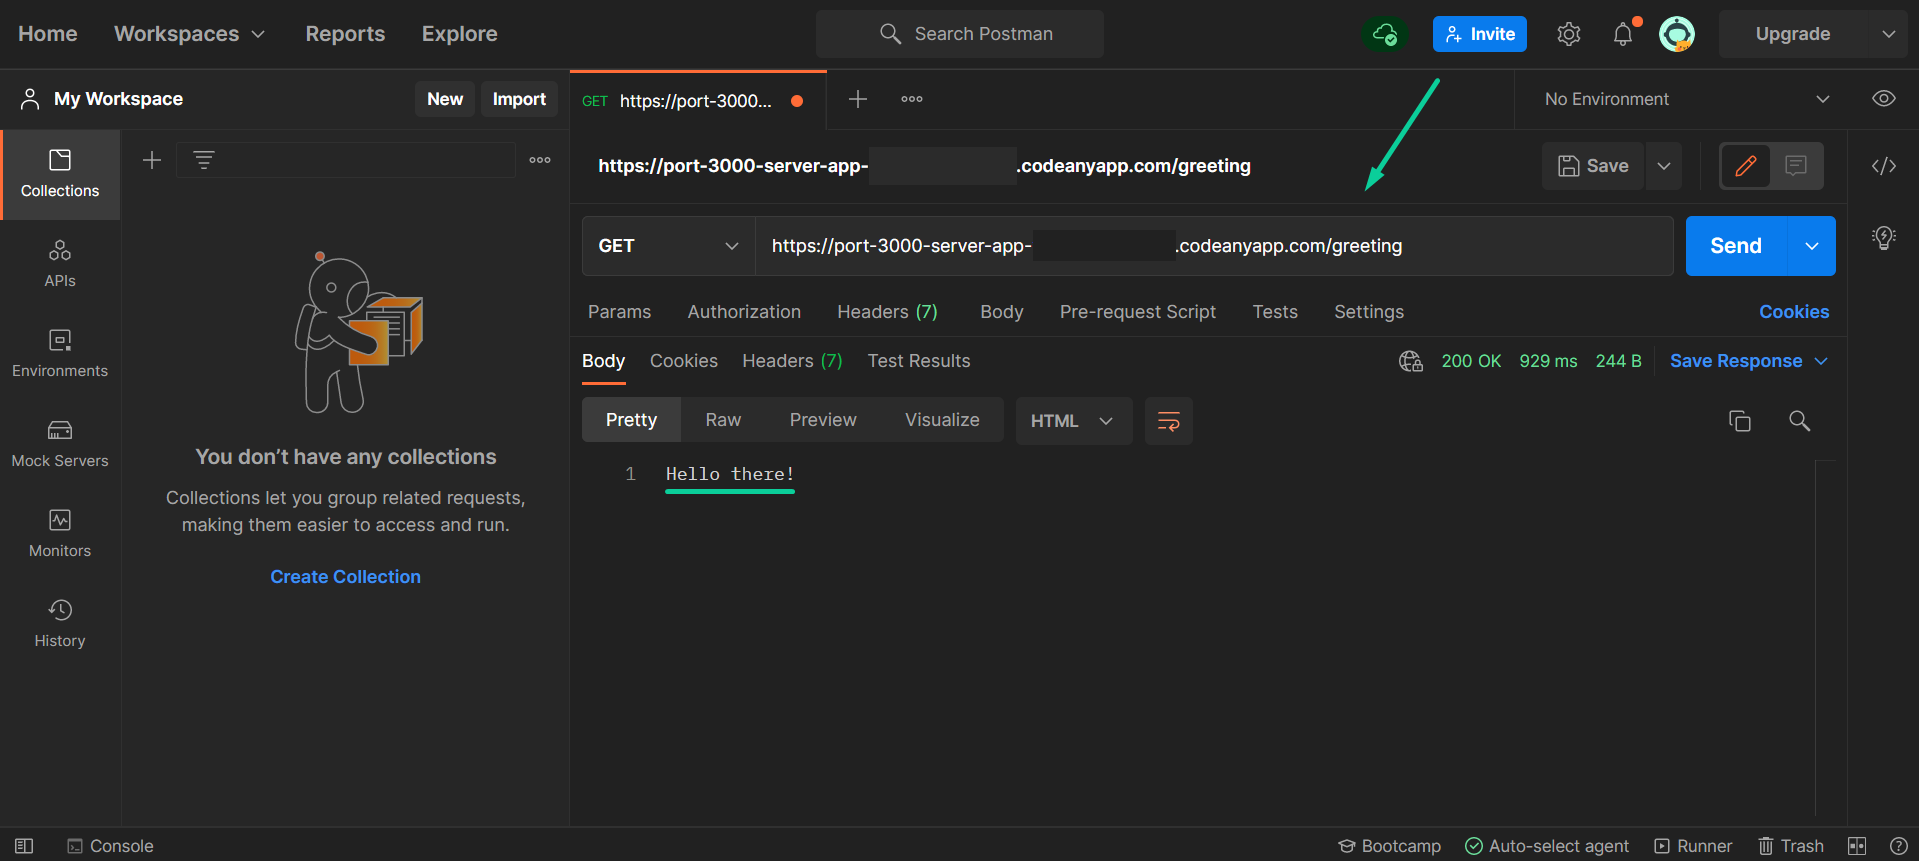
You can use that link as the base URL for your API and send specific requests to it using the Postman platform.
 My Node.js container is Always-on but my script stops running
The Always-on feature means that your container won't be stopped, and it isn't. It's the process that is being stopped. To avoid this you'll need a supervisor program to run your application.
There are plenty of supervisor programs available for Node.js but we strongly advise you to use PM2 - Keymetrics You can simply install it globally by running:
npm install pm2 -g
After that just run your application with:
pm2 start APP_SCRIPT.js
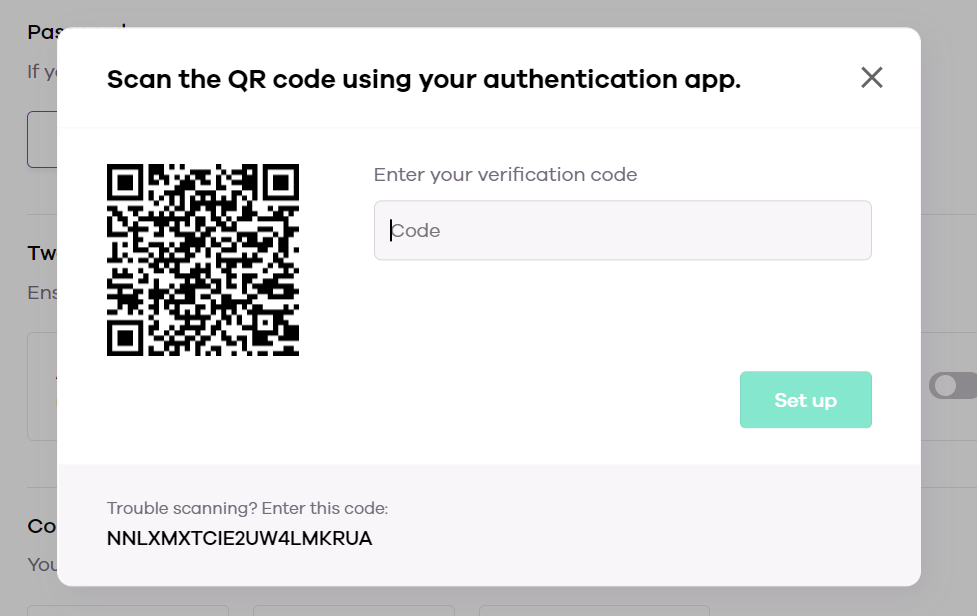
 How to Enable Two-Factor Authentication?
Navigate to the Two-Factor authetication section in the Account page and toggle the switch.
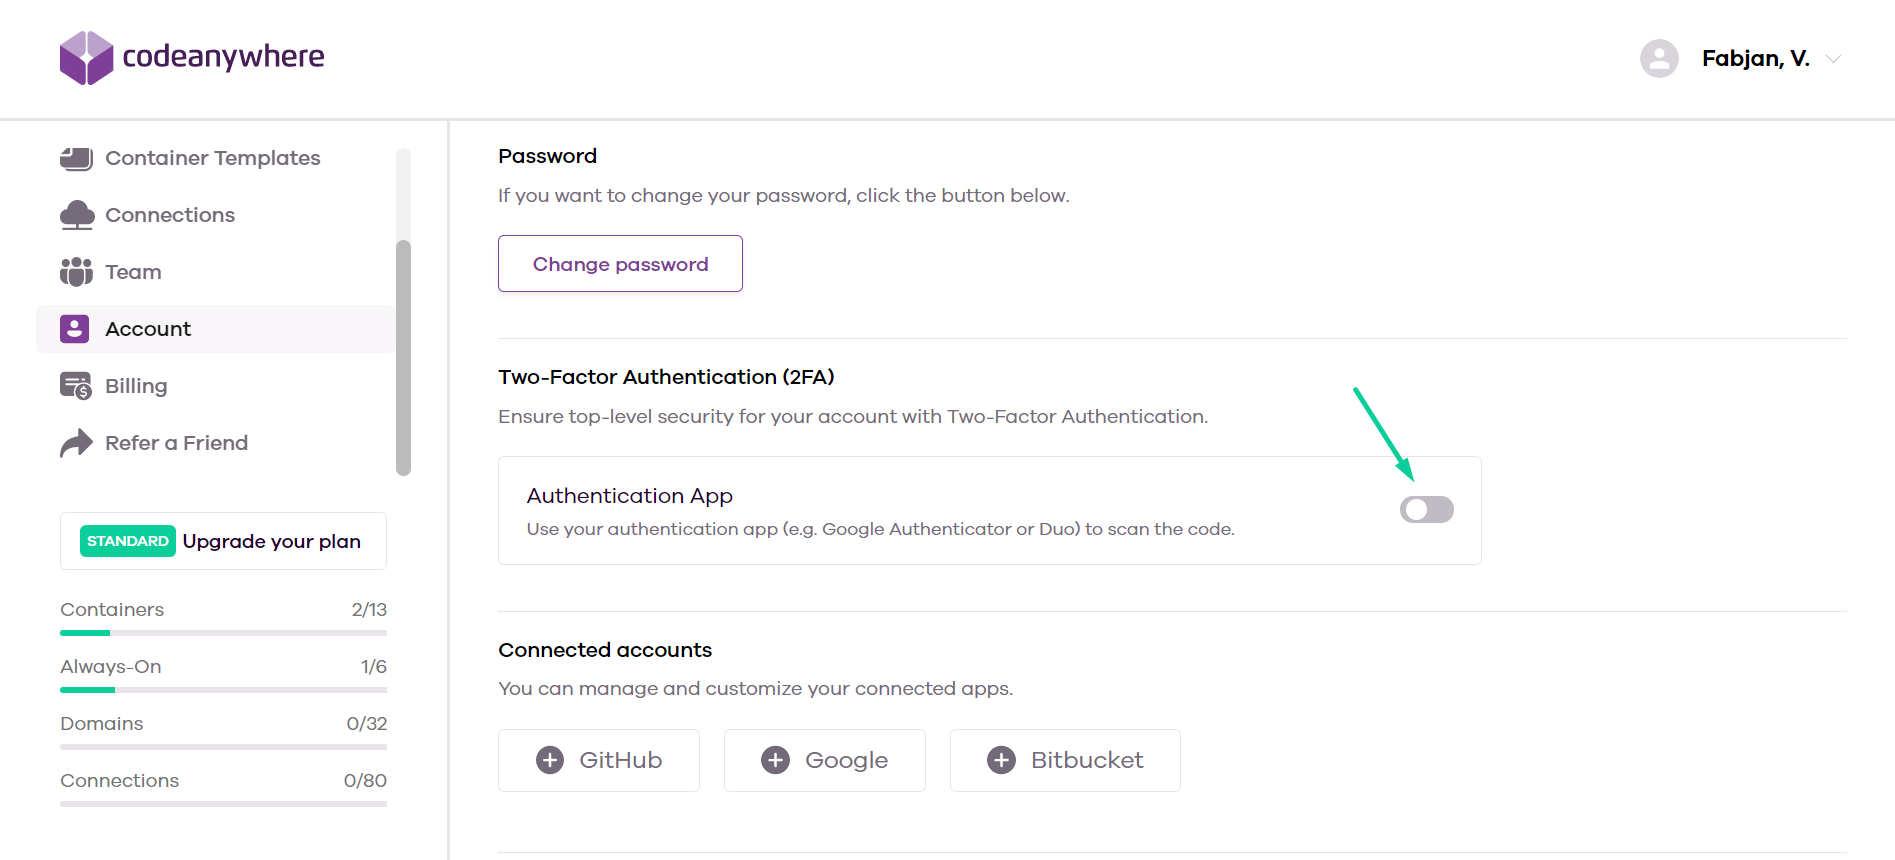
Scan the QR code with your authentication app and enter the confirmation code.
 Can I use Emmet in my project?
Emmet is enabled by default in your container workspace, including when collaborating with others.
Note: Auto-closing tags are currently not supported.
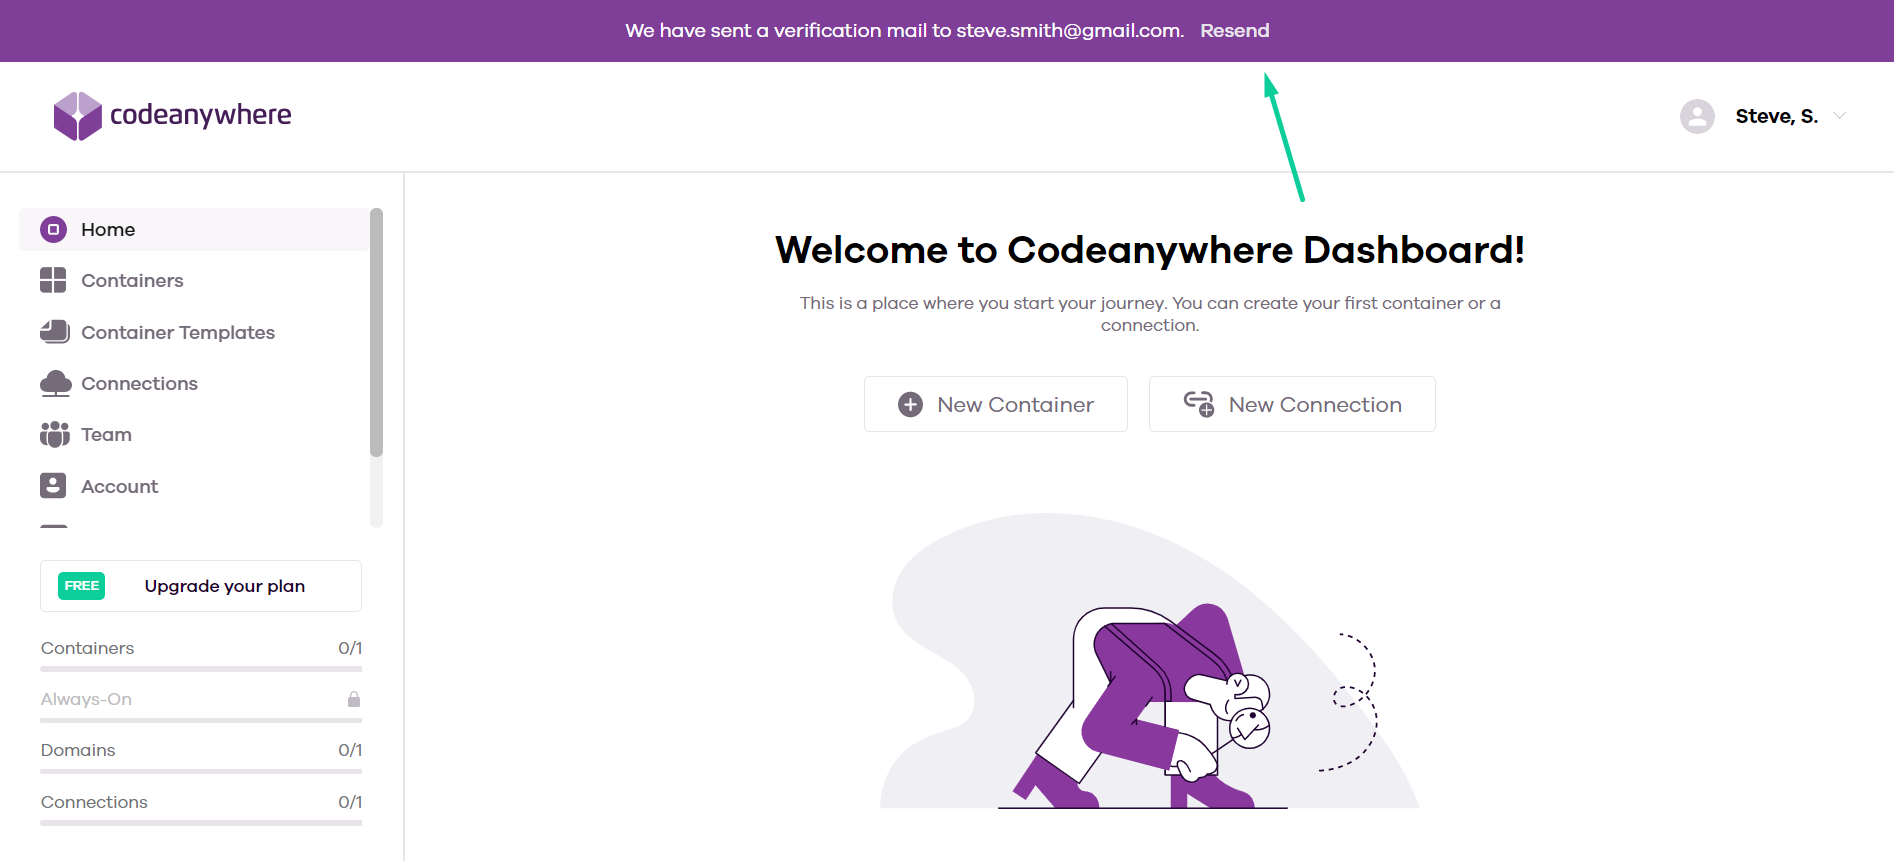
 My email verification didn't arrive, what should I do?
If your email has not been verified, you should see a banner with an option to Resend the verification email.
 I registered with my Facebook account, what is my password?
You don't need to set a password if you use Google, Facebook, GitHub or Bitbucket as a registration method. Nevertheless, if you want to set a Codeanywhere password, learn here how to do it.
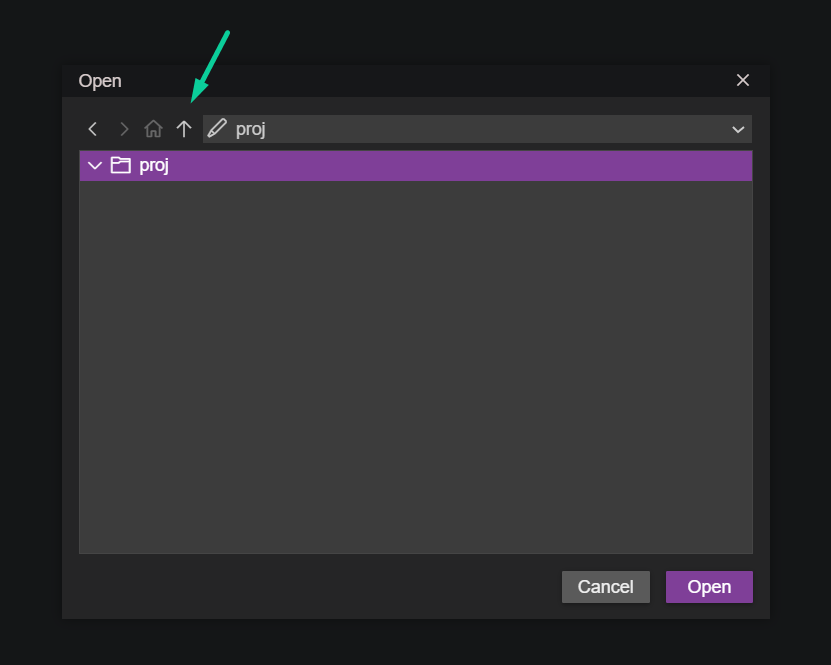
 How can I see my old files after I create a new Project?
Go to File -> Open and click the up arrow to see your old files.
 If I press the tab key, the last word is automatically repeated. How can I fix it?
In mobile devices the keyboard default configuration has autocomplete functions activated. You need to disable predictive text, automatic replacement, and automatic spell check and it will work fine without duplicated text.